Appearance
Generating PDFs from n8n using Papermill
n8n is a popular AI workflow automation tool. Because Papermill generates a PDF from a single HTTP request, you can produce documents from any n8n workflow using the built-in HTTP Request node - no community node needed.
A typical n8n workflow looks like this:
- Something triggers the workflow (a webhook, a schedule, a new row in a database).
- The workflow gathers and generates the content for the document - usually, JSON data and AI-generated markdown for text.
- An HTTP Request node sends that content to Papermill and receives the finished PDF.
- A subsequent node receives the PDF binary and shares it via email or uploads it to cloud storage.
Sending a Basic Request
Let's generate a report from n8n, using the Papermill Simple Report template available to all users.
Within n8n, add an HTTP Request node and configure it to call Papermill:
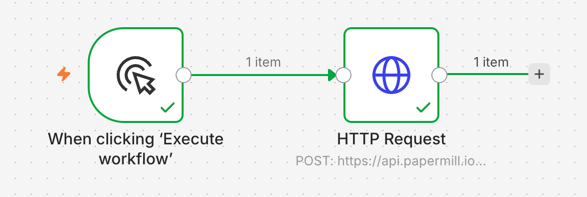
- Method:
POST - URL:
https://api.papermill.io/v2/pdf?template=papermill-simple-report - Send Body: on
- Body Content Type:
Raw, with content typetext/markdown - Body: some markdown, for example:
markdown
# Hello from n8n

This is markdown sent from within n8n!
You'll need to set the markdown to "Expression" rather than "Fixed" to avoid the text being collapsed to a single line.
Your node config should look like this:
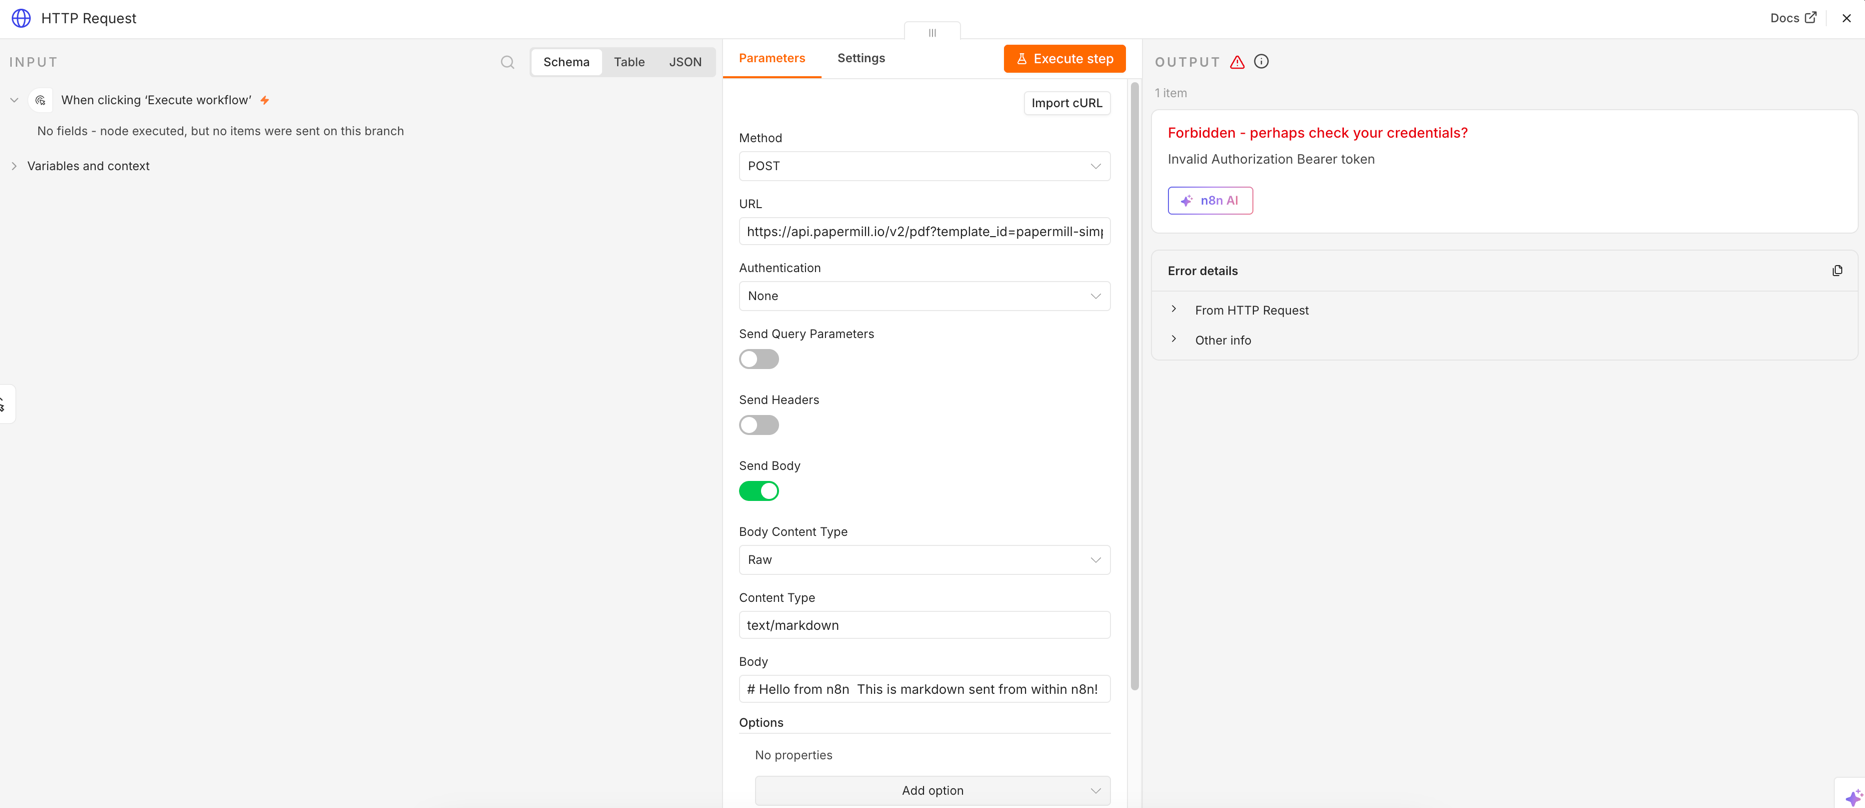
Before you can use this example, you'll need to add authentication.
Authentication
Papermill authenticates with a bearer token in the Authorization header. Rather than typing the key into every node, store it once as an n8n credential and reuse it.
- Create a Papermill key from Settings → API keys on the Papermill platform. Click "Create new API key", then "Copy to Clipboard".
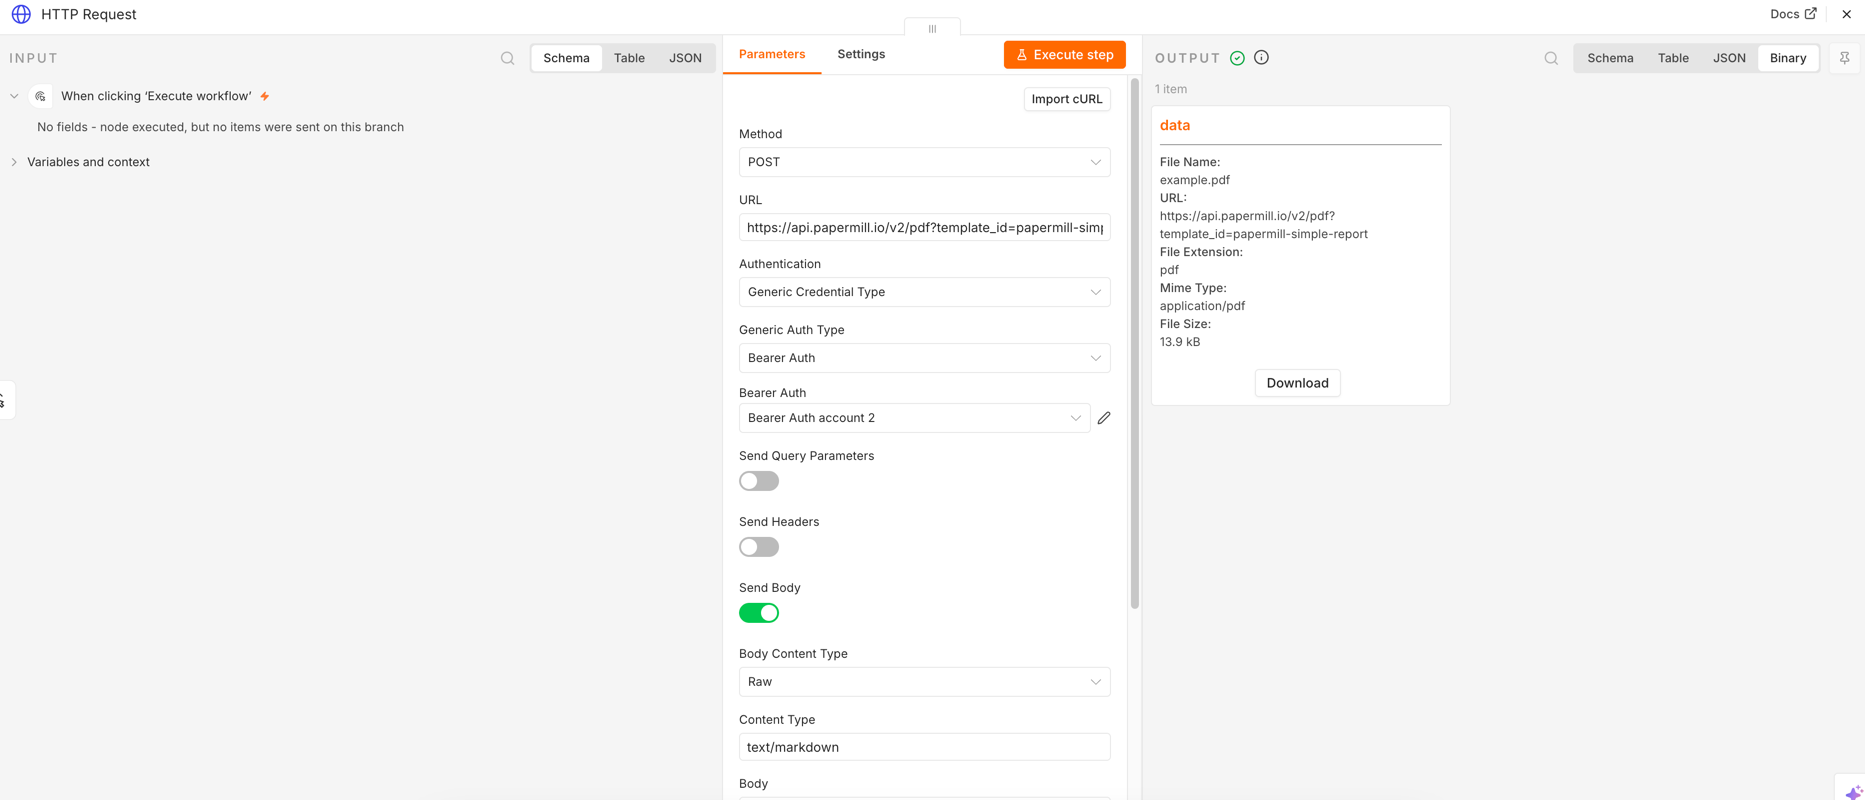
- In the HTTP Request node, set Authentication to
Generic Credential Type. - Set Generic Auth Type to
Bearer Auth. - Under "Bearer Auth" select "Create new credential".
- In the popup, paste your Papermill API key into "Bearer Token" and press "Save".
If a request comes back as 401 Unauthorized, the key is missing or invalid - try copying the API key from Papermill again.
To generate the report, hit "Execute Step". You should see a data card on the right with a "Download" button:
WARNING
Treat the key like a password. Keep it in the n8n credential, not in a node parameter or an expression that might end up in logs.
Sending content from earlier in a workflow
In the example above, the markdown was set in the node and no data was passed to Papermill - it's taken from the default values in the template.
In a real workflow the content comes from earlier nodes. n8n expressions let you put that data into the request body, so you can send text and data from your workflow to Papermill.
Model output from an AI node
If an earlier node - an AI Agent or chain node - produces the document text, reference its output in the Body field with the expression:
{{ $('My AI Node').json.output }}Papermill typesets whatever markdown the model returns into the chosen template, so the model only has to write content, not worry about layout.
INFO
Ask the model for plain markdown - headings, paragraphs, tables, lists. In most cases, you should let the template manage fonts, spacing, and page layout. Keeping the two concerns separate gives you consistent documents even when the model's output varies.
Sending both data and markdown to Papermill
Often you want to send both markdown from AI and structured data to Papermill. You can do so by sending a minimal Papermill payload in the Press language (set the HTTP Request node's body content type to text/xml), for example:
xml
<press>
   <flow type="markdown">
      <body>{{ $('My AI Node').json.output }}</body>
   </flow>
   <data type="json">
      {{ JSON.stringify($('My Data Node').item.json, null, 2) }}
   </data>
</press>
This assumes your markdown was generated in a node called "My AI Node" and the JSON Data in a node called "My Data Node". The markdown will replace the body text in the template's defaults, and the JSON data will be merged with the template's default settings.
The payload only needs the fields that change per document - the template supplies everything else. See Template & Payload for how the two combine.
A markdown string sent this way is read as Markdown, not as Press: a tag in it is typeset as characters, a {{ … }} expression resolves against the payload, and an unreachable image URL rejects the document. Validation flags a tag in the string as a warning before you render, so a check step catches model output that would print its markup. Model output is still copy you did not author, and filtering it on the way in does not make it safe — see What a payload string can carry before wiring a model straight into a markdown flow.
Reshaping data inside n8n
The data rarely arrives in exactly the shape a template expects. Some templates include a JSON schema so Papermill can check the data received is valid.
To ensure data is in the right shape, you may need to insert a Code node in n8n before the HTTP request. For example, you may need to rename fields, format numbers, or flatten or construct nested data:
javascript
return items.map((item) => ({
  json: {
    customerName: item.json.contact.fullName,
    total: `£${item.json.amount.toFixed(2)}`,
    items: item.json.lineItems,
  },
}))
The HTTP Request node then reads these tidied fields, which keeps the request body readable and the formatting logic in one place.
Receiving the PDF
Papermill returns the finished document as raw PDF bytes. To capture those in n8n, tell the HTTP Request node to treat the response as a file:
- Add Options → Response
- Response Format:
File - Put Output in Field:
data(this becomes the binary property name on the item)
The PDF is now a binary attachment on the item, ready for the node to use it. For example:
- Send Email / Gmail - attach the binary field and send the document to a customer.
- Google Drive, S3, Dropbox - upload it to storage.
- Respond to Webhook - return the PDF as the response to whatever called the workflow.
Point the downstream node's binary/attachment input at the field you named above (data) and it will pick up the PDF.
A simple example workflow with payload shaping and an upload to AWS S3 might look something like this:

Troubleshooting
401 Unauthorized- the API key is missing or invalid. Check your credential is set toBearer Authand that theAuthorizationheader starts withBearer.400 Bad Request- Papermill rejects the document when the content or payload is malformed. Confirm the body content type matches what you are sending (text/markdownfor raw markdown,text/xmlfor a<press>payload) and that any embedded JSON is valid.- The downstream node sees no file - confirm Response Format is set to
Fileand that the downstream node points at the same field name you set in Put Output in Field. - All the text is included in the heading of the PDF - make sure you've switched to "Expression" for the body field.